To compare two videos side by side, load both into a comparison app, pick a layout, scrub each video to the same key moment — ball contact, takeoff, release — and link them so they share one timeline. From that point they play, pause, and step frame by frame together, and the differences in technique become obvious.
Why side-by-side beats watching videos one after another
Human motion memory is short. Watch video A, then video B, and by the time B reaches the key position you are comparing it with a fading impression of A. Put the two videos next to each other, synchronized on the same instant, and the comparison happens in a single glance: hip height, knee angle, elbow position, timing. That is why side-by-side review is the standard tool of sports coaches, and why it works equally well for a golf swing, a sprint start, a serve, a lift, or a physio patient's gait.
The three classic pairings:
- Athlete vs. their past self — the progress check. Same drill, four weeks apart.
- Athlete vs. a model — a pro reference video or the team's best performer, used as a visual benchmark.
- Attempt vs. attempt — the good rep against the bad rep from the same session, to isolate what changed.
Step 1: Load two videos
In Coach Video Analysis, import from your Photos library, from Files, or record directly in the app; on a Mac you can drag and drop video files (MP4, MOV, AVI). The two clips don't need the same length, resolution, or orientation — you can rotate, flip, and zoom each one independently later.
Step 2: Choose a layout
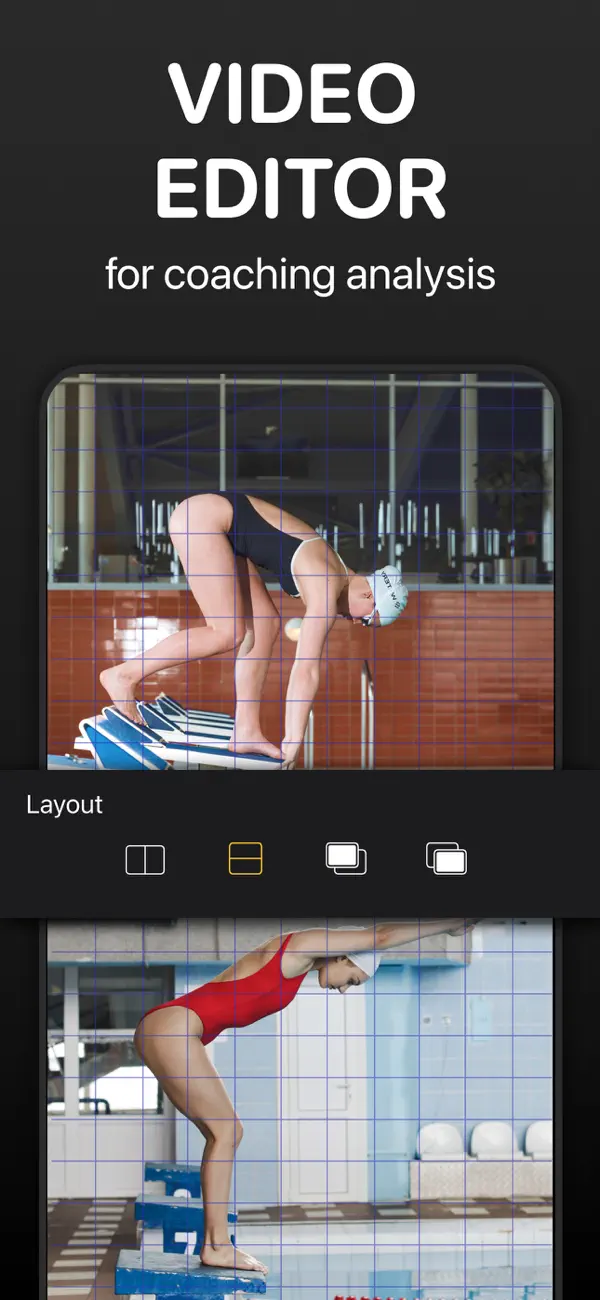
Tap Layout and pick what fits the movement:
- Side by side (horizontal) — best for portrait videos and standing movements: swings, serves, throws.
- Stacked (vertical) — best for landscape videos and horizontal movements: sprinting, swimming, skating.
- Overlay — one video plays on top of the other, for near-exact alignment. See the overlay comparison guide.
Step 3: Align on the key moment
Every movement has an unambiguous instant both videos share: the barbell leaves the floor, the club strikes the ball, the foot touches down. Scrub each video to that instant — this is where frame-by-frame stepping matters, because "roughly at impact" produces a comparison that is misleading by a tenth of a second. Zoom in on the timeline (pinch it) for fine control, and use the previous/next frame buttons to land exactly on the event in each video.
Step 4: Lock them together
Tap Lock. Both videos are now linked to a single timeline: press play and they run in sync, step a frame and both step, scrub and both follow. The relative offset you set in step 3 is preserved, so the two movements stay aligned through the whole clip. Tap Lock again to unlink and adjust either video independently — each gets its own scrubber, and tapping a video selects which one the transport controls drive.
Two more alignment tools are worth knowing:
- Grid overlays reference lines across both videos, so you can check that the horizon, a start line, or a body landmark sits at the same height in both.
- Speed per video — if one clip was filmed in slow motion and the other wasn't, slow the normal one down (1/16× to 4× per video) until the movements run at a comparable tempo.
Step 5: Export the comparison
Once linked, you can save the side-by-side view as a single split-screen video (MP4, 30 or 60 fps) or GIF, complete with your drawings — ready to send to an athlete or parent. For a quick highlight, the Clip button saves just the seconds around the current moment. See saving clips from a long video.
 Do this in Coach Video Analysis
The whole workflow above is the app's home screen: two video slots, the Layout button, frame-step buttons, timeline pinch-zoom, and one-tap Lock syncing. Add Markup drawings that mirror across both videos, then export split-screen video, GIF, or a kinogram. Works on iPhone, iPad, and Mac, with no account and nothing uploaded.